| Channel | Publish Date | Thumbnail & View Count | Actions |
|---|---|---|---|
 EvilComp EvilComp | 2023-03-04 02:39:45 | 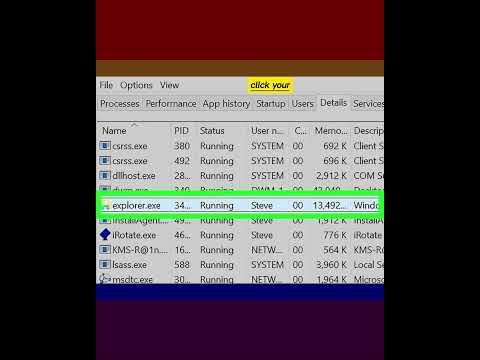 7,929 Views |
we teaches you how to change a Windows process’ priority in the Task Manager program. Changing a process’ priority determines how much of your computer’s memory space and resources are devoted to that process.
1-Open Start. Click the Windows logo in the bottom-left corner of the screen.
2-Type in task manager. Doing so will search your computer for the Task Manager app.
3-Click Task Manager. It’s the computer monitor-shaped icon at the top of the Start window. Clicking it prompts Task Manager to open.
4-Click the Details tab. This option is at the top of the Task Manager window, though it may not appear for a few seconds the Task Manager startup.
5-Find a process. On the Details tab, scroll down until you find the process for which you want to change the priority.
6-Right-click your selected process. A drop-down menu will appear on top of the process.
7-Select Set priority. It’s in the middle of the drop-down menu. Selecting it will cause a pop-out menu to appear.
8-Select a priority level. Click one of the following options, from fastest to slowest:
9-Click Change Priority when prompted. Doing so will confirm your decision and change the selected process’ priority.
10-Close Task Manager. Click the X in the top-right corner of the Task Manager window.
#windows #windows10 #permanet #set #process #pr #task manager #taskmanager #taskmanagers #taskmanagerui #taskmanagerapp #taskmanagerapps #process #processes #processing #processart #processvideo #portitionsizevideo #howtochange #howtochangelife #howtochangemylife #howtochangeyourmind #howtochangetheworld #windows8pro #windows81pro #windows11download #windows11features #windows11leaked #windows11home #Windows10 #windows 10 #windows7starter #windows7pro #Windows10Pro
Please take the opportunity to connect and share this video with your friends and family if you find it useful.