
| Channel | Publish Date | Thumbnail & View Count | Actions |
|---|---|---|---|
 Michael Klements Michael Klements | 2024-07-24 11:00:12 | 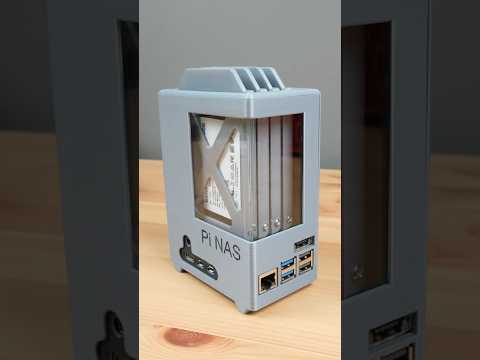 297,859 Views |
I decided to keep the vertical arrangement of the Radxa hat and rather have the drives plug in through the top of the case. I designed a tray for each drive with a pull tab to make it easier to swap out individual drives if needed. To cool the drives I’ve included a cutout for a 40mm, 5 volt fan on the side. This blows air across all 4 drives and the air then comes up around the gaps between the drives on the top of the enclosure. I also added an LED bar to bring the drive activity lights onto the side of the case. There’s a power button adapter to allow the Pi’s power button to be pressed and its LED to be visible and an optional window on the side of the NAS to look into it to see the drives.
Visit my blog for the full guide and 3D print files – https://www.the-diy-life.com/i-built-a-4-bay-raspberry-pi-5-based-nas/
Download the 3D Print Files to build your own NAS – https://bit.ly/3K7robG
Please take the opportunity to connect and share this video with your friends and family if you find it useful.


